前端部署
大约 2 分钟
前端部署
部署到 nginx
准备
修改发布配置manifest.json
- 登录
Hbuilder账号重新获取 appid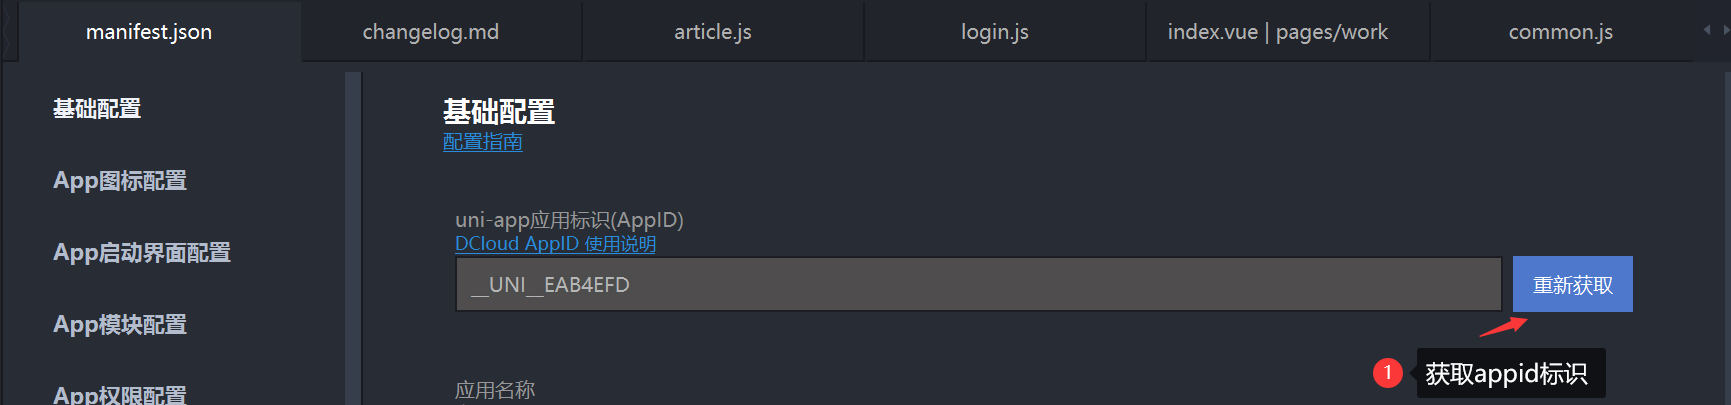
部署目录修改,这里部署到二级目录 /h5,如果部署到根目录 直接把高亮的行改成/
Vue2
"h5": {
    "publicPath": "/h5/",
    "template": "static/index.html",
    "devServer": {
      "port": 8886,
      "https": false
    },
    "title": "ZRAdmin-App",
    "router": {
      "mode": "hash",
      "base": "/h5/"
    }
  }
Vue3
...略
"h5": {
    "publicPath": "/h5/",
    "template": "static/index.html",
    "title": "ZRAdmin-App",
    "router": {
      "mode": "hash",
      "base": "/h5/"
    }
  }
发布项目
- 使用 Hbuilder-X 进行发布,菜单栏选择
发行->网站-PC
构建打包成功之后,会在根目录生成 unpackage/dist/build/h5 文件夹,里面就是构建打包好的文件,通常是 .js 、.css、index.html 等静态文件。
配置 nginx
- 这里以部署到二级目录为例
http://www.xxx.com/h5
- 在
ngnix/config/nginx.conf(实际地址以你安装为准) http 模块中添加以下配置文件 - 在
nginx安装目录中的html目录中创建文件夹zradmin_h5或者其他目录 - 将 打包后的文件夹上传到刚刚创建的
zradmin_h5中 - 浏览器中访问
http://域名/外网IP:port/h5
server {
	#修改要监听的端口
	listen 80;
	#修改要绑定的域名或IP地址
 	server_name 域名/外网IP; # 例如:www.xxx.com/0.0.0.0

	# vue项目配置
	location /h5 {
		#linux 路径
		root html/zradmin/dist;
		#windows下路径
		#alias d:/home/website/zradmin/dist;
		index index.html;
		# 避免出现404
		try_files $uri $uri/ /h5/index.html;
	}

	# 后端接口
	location /prod-api/ {
		proxy_pass  http://localhost:8888/;

		# 后端的Web服务器可以通过X-Forwarded-For获取用户真实IP
		proxy_set_header Host $host;
		proxy_set_header X-Real-IP $remote_addr;
		proxy_set_header X-Forwarded-For $proxy_add_x_forwarded_for;
 	 }

	# signalR(web socket)
	location ~* ^/msgHub {
		proxy_pass  http://localhost:8888;   #注意后面没有/
		#后端的Web服务器可以通过X-Forwarded-For获取用户真实IP
		proxy_set_header Host $host;
		proxy_set_header X-Real-IP $remote_addr;
		proxy_set_header X-Forwarded-For $proxy_add_x_forwarded_for;
		#启用http长连接支持websocket
		proxy_http_version 1.1;
		proxy_set_header Upgrade $http_upgrade;
		proxy_set_header Connection "upgrade";
	}

	# redirect server error pages to the static page /50x.html
	error_page 500 502 503 504  /50x.html;
	location = /50x.html {
		root html;
	}
}
重启 nginx
浏览器中输入 http://www.yourdomain.com/h5
部署到 iis
参考 web 端部署步骤 点击查看详情